跨供应商 OpenCL 和 Vulkan 互操作性
| 此示例的源代码可以在 Khronos Vulkan 示例 github 存储库中找到。 |
背景
即使 Vulkan 中强制要求计算支持,在某些情况下,可能仍然需要 OpenCL 更广泛的计算功能,例如用于复杂的科学计算或重用现有的 OpenCL 内核。为此,两个 API 都提供了一组与供应商无关的扩展,允许对两个 API 都已知的对象进行零拷贝共享(称为“API 互操作性”)。零拷贝意味着两个 API 都可以访问这些对象,而无需在 API 之间复制和拷贝它们。这允许在 Vulkan 和 OpenCL 之间高效共享这些对象。
示例
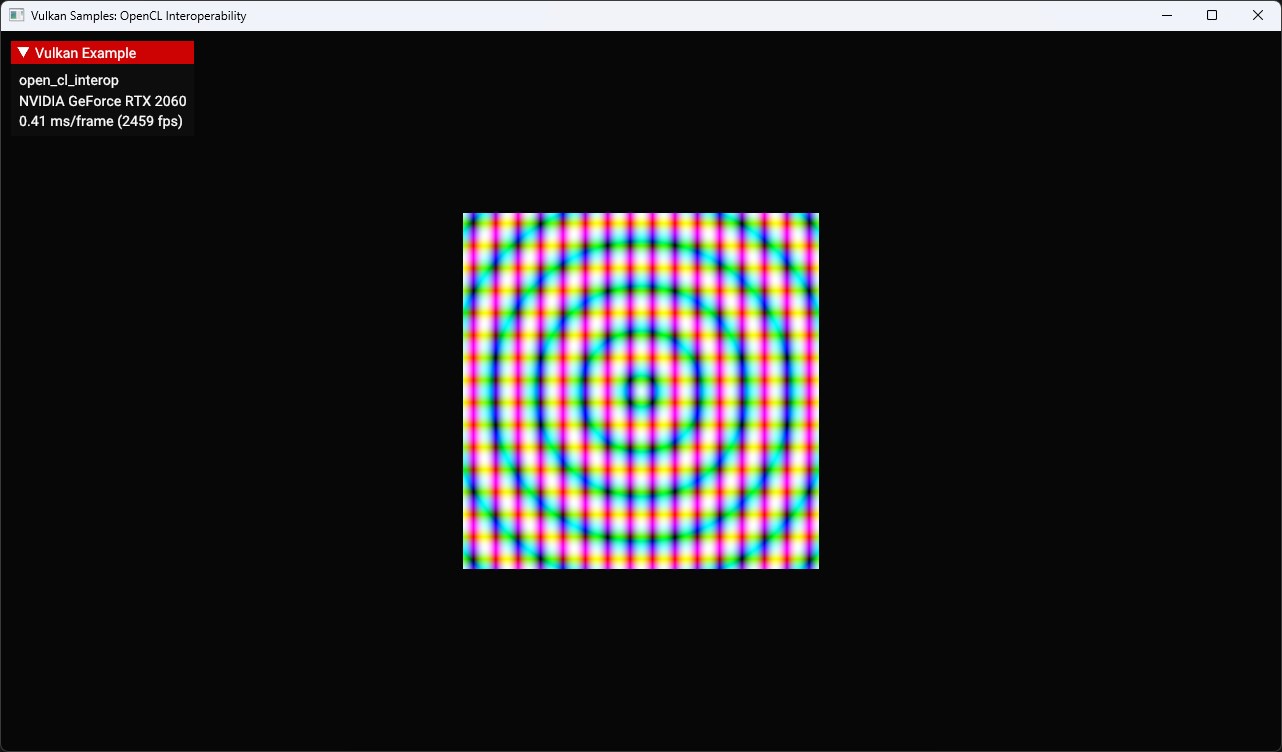
此示例演示了零拷贝共享,使用 OpenCL 计算内核更新图像,并在 Vulkan 内部的四边形上将其显示为纹理。为了在两个 API 之间进行同步,该示例还使用了共享信号量。
为了充分理解此示例的工作原理,建议您具备 Vulkan 和 OpenCL 的经验。虽然这两个 API 都由 Khronos 维护,但它们在使用和概念上差异很大
所需扩展
Vulkan 和 OpenCL 都提供了所谓的外部对象的扩展。外部对象是可以被多个 API 引用的对象。在此示例中,我们共享图像和信号量,因此我们需要在两个 API 上启用相关的扩展。
对于共享图像的后备内存,在 Vulkan 中,我们需要在实例级别启用 VK_KHR_external_memory_capabilities,并在设备级别启用 VK_KHR_external_memory。我们还需要根据我们运行的平台启用特定的扩展。对于 Windows,这是 VK_KHR_external_memory_win32,对于所有基于 Unix 的平台,我们需要启用 VK_KHR_external_memory_fd。这些扩展的 OpenCL 等效项是 cl_khr_external_memory、cl_khr_external_memory_win32 (Windows) 和 cl_khr_external_memory_opaque_fd (基于 Unix 的平台)。
为了共享用于在API之间同步图像访问的信号量,在 Vulkan 中,我们需要在实例级别启用 VK_KHR_external_semaphore_capabilities,并在设备级别启用 VK_KHR_external_semaphore。特定平台的启用扩展为:Windows 使用 VK_KHR_external_semaphore_win32,基于 Unix 的平台使用 VK_KHR_external_semaphore_fd。OpenCL 对应的扩展是 cl_khr_external_semaphore、cl_khr_external_semaphore_win32 (Windows) 和 cl_khr_external_semaphore_opaque_fd (基于 Unix 的平台)。
我们还需要匹配 Vulkan 和 OpenCL 之间的设备。在 Vulkan 中,此功能由 VK_KHR_external_memory_capabilities 扩展提供,在 OpenCL 中,这需要 cl_khr_device_uuid。稍后会详细介绍。
匹配设备
对于我们将在 Vulkan 和 OpenCL 之间共享的外部对象类型,我们必须确保在 Vulkan 和 OpenCL 中使用相同的设备。请参阅 规范的这一章,了解为什么需要这样做以及这适用于哪些类型的外部对象。特别是在桌面系统上,您可能拥有多个 Vulkan 和/或 OpenCL 实现,并且它们可能在两个 API 中以不同的顺序报告。因此,仅仅假设第一个 Vulkan 设备也是第一个 OpenCL 设备可能无法正常工作。
为此,两个 API 都公开了通用唯一(设备)标识符 (uuid),我们可以使用这些标识符来匹配 API 之间的设备。这在 prepare_opencl_resources 函数中完成。由于这是一个 Vulkan 示例,我们将尝试查找与我们的 Vulkan 示例的 UUID 匹配的 OpenCL 设备。
// Get the UUID of the current Vulkan device
VkPhysicalDeviceIDPropertiesKHR physical_device_id_propreties{};
physical_device_id_propreties.sType = VK_STRUCTURE_TYPE_PHYSICAL_DEVICE_ID_PROPERTIES;
VkPhysicalDeviceProperties2 physical_device_properties_2{};
physical_device_properties_2.sType = VK_STRUCTURE_TYPE_PHYSICAL_DEVICE_PROPERTIES_2_KHR;
physical_device_properties_2.pNext = &physical_device_id_propreties;
vkGetPhysicalDeviceProperties2KHR(device->get_gpu().get_handle(), &physical_device_properties_2);

// Iterate over all available OpenCL platforms and find the first that fits our requirements (extensions, device UUID)
cl_uint num_platforms;
clGetPlatformIDs_ptr(0, nullptr, &num_platforms);

std::vector<cl_platform_id> platform_ids(num_platforms);
clGetPlatformIDs_ptr(num_platforms, platform_ids.data(), nullptr);

cl_platform_id selected_platform_id{nullptr};
cl_device_id   selected_device_id{nullptr};

// Iterate over all available OpenCL platforms
for (auto &platform_id : platform_ids)
{
	cl_uint        num_devices;
	clGetDeviceIDs_ptr(platform_id, CL_DEVICE_TYPE_ALL, 0, nullptr, &num_devices);
	std::vector<cl_device_id> device_ids(num_devices);
	clGetDeviceIDs_ptr(platform_id, CL_DEVICE_TYPE_ALL, num_devices, device_ids.data(), nullptr);

	...

	// Check every device of this platform and see if it matches our Vulkan device UUID
	selected_device_id = nullptr;
	for (auto &device_id : device_ids)
	{
		cl_uchar uuid[CL_UUID_SIZE_KHR];
		clGetDeviceInfo_ptr(device_id, CL_DEVICE_UUID_KHR, sizeof(uuid), &uuid, nullptr);

		bool device_uuid_match = true;

		for (uint32_t i = 0; i < CL_UUID_SIZE_KHR; i++)
		{
			if (uuid[i] != physical_device_id_propreties.deviceUUID[i])
			{
				device_uuid_match = false;
				break;
			}
		}

		if (!device_uuid_match)
		{
			continue;
		}

		// We found a device with a matching UUID, so use it
		selected_device_id = device_id;
		break;
	}

	...
}
关于 Windows 安全性的说明
在 Windows 上,我们需要确保对外部句柄的共享内存具有读取和写入权限(请参阅 规范)。这需要使用 Windows API 设置安全属性。为了简化此操作,该示例在 WinSecurityAttributes 类中实现了这一点。然后在我们在 Windows 上共享内存的所有地方使用它。
创建和共享图像
该示例将使用 OpenCL 更新图像的内容,并在 Vulkan 中用四边形显示它。因此,我们首先需要在 Vulkan 中设置该图像(及其内存),就像任何其他具有适当使用标志的图像一样
VkImageCreateInfo image_create_info = vkb::initializers::image_create_info();
image_create_info.imageType         = VK_IMAGE_TYPE_2D;
image_create_info.format            = VK_FORMAT_R8G8B8A8_UNORM;
image_create_info.mipLevels         = 1;
image_create_info.arrayLayers       = 1;
image_create_info.samples           = VK_SAMPLE_COUNT_1_BIT;
image_create_info.tiling            = VK_IMAGE_TILING_OPTIMAL;
image_create_info.extent            = {shared_image.width, shared_image.height, shared_image.depth};
image_create_info.usage             = VK_IMAGE_USAGE_STORAGE_BIT | VK_IMAGE_USAGE_TRANSFER_SRC_BIT | VK_IMAGE_USAGE_TRANSFER_DST_BIT | VK_IMAGE_USAGE_SAMPLED_BIT;
并使用图像创建信息结构的 pNext 链中的 VkExternalMemoryImageCreateInfo 将其标记为外部,以便其他 API(在我们的例子中是 OpenCL)能够访问它
VkExternalMemoryImageCreateInfo external_memory_image_info{};
external_memory_image_info.sType       = VK_STRUCTURE_TYPE_EXTERNAL_MEMORY_IMAGE_CREATE_INFO;
external_memory_image_info.handleTypes = external_handle_type;

image_create_info.pNext = &external_memory_image_info;
VK_CHECK(vkCreateImage(get_device().get_handle(), &image_create_info, nullptr, &shared_image.image));就像所需的扩展一样,handleTypes 也是特定于平台的。Windows 需要使用 VK_EXTERNAL_MEMORY_HANDLE_TYPE_OPAQUE_WIN32_BIT_KHR,基于 Unix 的平台(包括 Android)需要使用 VK_EXTERNAL_MEMORY_HANDLE_TYPE_OPAQUE_FD_BIT_KHR。
我们需要对支持我们图像的内存执行相同的操作,因为我们也在示例的 Vulkan 部分中分配了它。我们将 VkExportMemoryAllocateInfoKHR 结构链接到内存分配中
VkExportMemoryAllocateInfoKHR export_memory_allocate_info{};
export_memory_allocate_info.sType = VK_STRUCTURE_TYPE_EXPORT_MEMORY_ALLOCATE_INFO_KHR;
export_memory_allocate_info.handleTypes = external_handle_type;
#ifdef _WIN32
	export_memory_allocate_info.pNext = &export_memory_win32_handle_info;
#endif

VkMemoryAllocateInfo memory_allocate_info = vkb::initializers::memory_allocate_info();
memory_allocate_info.pNext                = &export_memory_allocate_info;
memory_allocate_info.allocationSize       = memory_requirements.size;
memory_allocate_info.memoryTypeIndex      = device->get_memory_type(memory_requirements.memoryTypeBits, 0);

VK_CHECK(vkAllocateMemory(device_handle, &memory_allocate_info, nullptr, &shared_image.memory));
VK_CHECK(vkBindImageMemory(device_handle, shared_image.image, shared_image.memory, 0));
如前所述,在 Windows 上,我们需要使用 VkExportMemoryWin32HandleInfoKHR 结构传递额外的与进程安全相关的信息
#ifdef _WIN32
	WinSecurityAttributes            win_security_attributes;
	VkExportMemoryWin32HandleInfoKHR export_memory_win32_handle_info{};
	export_memory_win32_handle_info.sType       = VK_STRUCTURE_TYPE_EXPORT_MEMORY_WIN32_HANDLE_INFO_KHR;
	export_memory_win32_handle_info.pAttributes = &win_security_attributes;
	export_memory_win32_handle_info.dwAccess    = DXGI_SHARED_RESOURCE_READ | DXGI_SHARED_RESOURCE_WRITE;
	export_memory_allocate_info.pNext           = &export_memory_win32_handle_info;
#endif
一旦我们在 Vulkan 中创建了图像及其内存,我们就会切换到 OpenCL,在 OpenCL 中我们将导入该图像。请注意,OpenCL API 与 Vulkan 非常不同。例如,OpenCL 通常使用以零结尾的属性列表而不是显式结构。
对于此属性列表,我们需要获取支持我们图像的 Vulkan 内存的可共享句柄。这是通过 get_vulkan_memory_handle 函数完成的,该函数是对 Vulkan 函数的轻量级包装,用于获取特定于平台的句柄(例如,Windows 上的 vkGetMemoryWin32HandleKHR)
	std::vector<cl_mem_properties> mem_properties;

#ifdef _WIN32
	HANDLE handle = get_vulkan_memory_handle(shared_image.memory);
	mem_properties.push_back((cl_mem_properties) CL_EXTERNAL_MEMORY_HANDLE_OPAQUE_WIN32_KHR);
	mem_properties.push_back((cl_mem_properties) handle);
#else
	int fd = get_vulkan_memory_handle(shared_image.memory);
	mem_properties.push_back((cl_mem_properties) CL_EXTERNAL_MEMORY_HANDLE_OPAQUE_FD_KHR);
	mem_properties.push_back((cl_mem_properties) fd);
#endif
	mem_properties.push_back((cl_mem_properties) CL_MEM_DEVICE_HANDLE_LIST_KHR);
	mem_properties.push_back((cl_mem_properties) opencl_objects.device_id);
	mem_properties.push_back((cl_mem_properties) CL_MEM_DEVICE_HANDLE_LIST_END_KHR);
	mem_properties.push_back(0);
然后使用该句柄创建一个 OpenCL 图像
cl_image_format cl_img_fmt{};
cl_img_fmt.image_channel_order     = CL_RGBA;
cl_img_fmt.image_channel_data_type = CL_UNSIGNED_INT8;

cl_image_desc cl_img_desc{};
cl_img_desc.image_width       = shared_image.width;
cl_img_desc.image_height      = shared_image.height;
cl_img_desc.image_type        = CL_MEM_OBJECT_IMAGE2D;
cl_img_desc.image_slice_pitch = cl_img_desc.image_row_pitch * cl_img_desc.image_height;
cl_img_desc.num_mip_levels    = 1;
cl_img_desc.buffer            = nullptr;

int cl_result;
opencl_objects.image = clCreateImageWithProperties(opencl_objects.context,
                                                    mem_properties.data(),
                                                    CL_MEM_READ_WRITE,
                                                    &cl_img_fmt,
                                                    &cl_img_desc,
                                                    NULL,
                                                    &cl_result);
CL_CHECK(cl_result);
这里有趣的部分是
cl_img_desc.buffer = nullptr;这意味着我们不会在 OpenCL 中分配支持图像的缓冲区,而是通过 mem_properties 属性列表中指定的句柄导入它。
调用 clCreateImageWithProperties 后,我们就可以在两个 API 中使用该图像了。
创建和共享信号量
为了在 Vulkan 和 OpenCL 之间同步工作,我们将使用信号量。同样,我们在示例的 Vulkan 部分的 OpenCLInterop::prepare_sync_objects() 函数内创建这些信号量。共享它们与共享任何其他对象(例如,图像)非常相似
VkExportSemaphoreCreateInfoKHR export_semaphore_create_info{};
export_semaphore_create_info.sType = VK_STRUCTURE_TYPE_EXPORT_SEMAPHORE_CREATE_INFO_KHR;

#ifdef _WIN32
WinSecurityAttributes               win_security_attributes;
VkExportSemaphoreWin32HandleInfoKHR export_semaphore_handle_info{};
export_semaphore_handle_info.sType       = VK_STRUCTURE_TYPE_EXPORT_SEMAPHORE_WIN32_HANDLE_INFO_KHR;
export_semaphore_handle_info.pAttributes = &win_security_attributes;
export_semaphore_handle_info.dwAccess    = DXGI_SHARED_RESOURCE_READ | DXGI_SHARED_RESOURCE_WRITE;

export_semaphore_create_info.pNext       = &export_semaphore_handle_info;
export_semaphore_create_info.handleTypes = VK_EXTERNAL_SEMAPHORE_HANDLE_TYPE_OPAQUE_WIN32_BIT;
#else
export_semaphore_create_info.handleTypes = VK_EXTERNAL_SEMAPHORE_HANDLE_TYPE_OPAQUE_FD_BIT;
#endif

VkSemaphoreCreateInfo semaphore_create_info{};
semaphore_create_info.sType = VK_STRUCTURE_TYPE_SEMAPHORE_CREATE_INFO;
semaphore_create_info.pNext = &export_semaphore_create_info;

VK_CHECK(vkCreateSemaphore(device->get_handle(), &semaphore_create_info, nullptr, &cl_update_vk_semaphore));
VK_CHECK(vkCreateSemaphore(device->get_handle(), &semaphore_create_info, nullptr, &vk_update_cl_semaphore));
我们再次根据我们编译的平台选择句柄类型,如果它是 Windows 系统,我们在使用 vkCreateSemaphore 创建两个信号量之前,设置所需的安全访问信息。
完成 Vulkan 部分后,我们再次切换到 OpenCL,在 OpenCL 中我们将导入 Vulkan 信号量。get_vulkan_semaphore_handle 函数是一个方便的包装器,用于获取 Vulkan 信号量的特定于平台的句柄。它在 Windows 上使用 vkGetSemaphoreWin32HandleKHR,在所有其他平台上使用 vkGetSemaphoreFdKHR
std::vector<cl_semaphore_properties_khr> semaphore_properties{
    (cl_semaphore_properties_khr) CL_SEMAPHORE_TYPE_KHR,
    (cl_semaphore_properties_khr) CL_SEMAPHORE_TYPE_BINARY_KHR,
    (cl_semaphore_properties_khr) CL_SEMAPHORE_DEVICE_HANDLE_LIST_KHR,
    (cl_semaphore_properties_khr) opencl_objects.device_id,
    (cl_semaphore_properties_khr) CL_SEMAPHORE_DEVICE_HANDLE_LIST_END_KHR,
};

// CL to VK semaphore

// We need to select the external handle type based on our target platform
#ifdef _WIN32
semaphore_properties.push_back((cl_semaphore_properties_khr) CL_SEMAPHORE_HANDLE_OPAQUE_WIN32_KHR);
HANDLE handle = get_vulkan_semaphore_handle(cl_update_vk_semaphore);
semaphore_properties.push_back((cl_semaphore_properties_khr) handle);
#else
semaphore_properties.push_back((cl_semaphore_properties_khr) CL_SEMAPHORE_HANDLE_OPAQUE_FD_KHR);
int fd = get_vulkan_semaphore_handle(cl_update_vk_semaphore);
semaphore_properties.push_back((cl_semaphore_properties_khr) fd);
#endif
semaphore_properties.push_back(0);

cl_int cl_result;

opencl_objects.cl_update_vk_semaphore = clCreateSemaphoreWithPropertiesKHR(opencl_objects.context, semaphore_properties.data(), &cl_result);
CL_CHECK(cl_result);

// Remove the last two entries so we can push the next handle and zero terminator to the properties list and re-use the other values
semaphore_properties.pop_back();
semaphore_properties.pop_back();

// VK to CL semaphore
// Code is the same, and not repeated here
...
在 API 之间共享数据
现在,Vulkan 和 OpenCL 之间共享的所有对象都已设置好,我们实际上可以开始共享图像了。请记住,我们将使用 OpenCL 来更新图像的内容,然后在我们的 Vulkan 示例中用四边形显示该图像。这在 OpenCLInterop::render() 函数中完成。
这包括正确同步图像访问以及在两个 API 之间获取和释放图像。
首先,我们需要确保显示我们图像的命令缓冲区已完成。这在 Vulkan 端使用栅栏完成
vkWaitForFences(device->get_handle(), 1, &rendering_finished_fence, VK_TRUE, std::numeric_limits<uint64_t>::max());
vkResetFences(device->get_handle(), 1, &rendering_finished_fence);
接下来是工作提交。由于我们现在向两个不同的 API 提交工作,我们需要确保它们将正确地等待和发出信号量。如上所述,我们有两个信号量
-
cl_update_vk_semaphore- 由 OpenCL 发出信号,由 Vulkan 等待 -
vk_update_cl_semaphore- 由 Vulkan 发出信号,由 OpenCL 等待
由于 Vulkan 中基本信号量的工作方式(我们没有使用时间线信号量),我们无法手动发出信号。因此,我们区分第一次和连续的命令缓冲区提交
if (first_submit)
{
	first_submit      = false;
	wait_stages       = {VK_PIPELINE_STAGE_COLOR_ATTACHMENT_OUTPUT_BIT};
	wait_semaphores   = {semaphores.acquired_image_ready};
	signal_semaphores = {semaphores.render_complete, vk_update_cl_semaphore};
}
else
{
	wait_stages       = {VK_PIPELINE_STAGE_COLOR_ATTACHMENT_OUTPUT_BIT, VK_PIPELINE_STAGE_ALL_COMMANDS_BIT};
	wait_semaphores   = {semaphores.acquired_image_ready, cl_update_vk_semaphore};
	signal_semaphores = {semaphores.render_complete, vk_update_cl_semaphore};
}
..
VK_CHECK(vkQueueSubmit(queue, 1, &submit_info, rendering_finished_fence));
第一次提交不会等待任何 OpenCL 信号量(因为它尚未发出信号),并发出 Vulkan->OpenCL 信号量。因此,Vulkan 队列提交之后的 OpenCl 工作负载将等待它。
在连续提交时,OpenCL 代码工作负载已经提交,因此我们还将等待 OpenCL->vulkan 信号量。此外,我们还提供了一个额外的管道阶段来等待以匹配 OpenCL 的工作负载。
现在我们转移到 OpenCL 端,使用 OpenCL 内核更新我们的图像。这里的概念与 Vulkan API 中的概念类似。
我们首先等待 Vulkan->OpenCL 信号量,以确保图形队列的 Vulkan 端在我们开始 OpenCL 更新部分之前完成
CL_CHECK(clEnqueueWaitSemaphoresKHR(opencl_objects.command_queue, 1, &opencl_objects.vk_update_cl_semaphore, nullptr, 0, nullptr, nullptr));然后,我们需要获取从我们的图像创建的图像句柄。在这种情况下,图像是一个外部内存句柄(到 OpenCL),因为它是在 Vulkan 中创建的
CL_CHECK(clEnqueueAcquireExternalMemObjectsKHR(opencl_objects.command_queue, 1, &opencl_objects.image, 0, nullptr, nullptr));一旦我们成功获取了用于 OpenCL 的图像,我们就可以运行内核来更新图像内容。OpenCL 内核类似于 Vulkan 计算着色器。这部分示例不特定于 API 共享,只是一个关于如何在图像上运行 OpenCL 内核的基本示例。
std::array<size_t, 2> global_size = {shared_image.width, shared_image.height};
std::array<size_t, 2> local_size  = {16, 16};

CL_CHECK(clSetKernelArg(opencl_objects.kernel, 0, sizeof(cl_mem), &opencl_objects.image));
CL_CHECK(clSetKernelArg(opencl_objects.kernel, 1, sizeof(float), &total_time_passed));
CL_CHECK(clEnqueueNDRangeKernel(opencl_objects.command_queue, opencl_objects.kernel, global_size.size(), nullptr, global_size.data(), local_size.data(), 0, nullptr, nullptr));
在这个命令之后,我们可以通过在 OpenCL 端释放图像来将图像的所有权返回给 Vulkan。
CL_CHECK(clEnqueueReleaseExternalMemObjectsKHR(opencl_objects.command_queue, 1, &opencl_objects.image, 0, nullptr, nullptr));之后,我们从 OpenCL 端发出 OpenCL->Vulkan 信号量,以便 Vulkan 可以等待此信号量进行下一帧的操作。
CL_CHECK(clEnqueueSignalSemaphoresKHR(opencl_objects.command_queue, 1, &opencl_objects.cl_update_vk_semaphore, nullptr, 0, nullptr, nullptr));在 OpenCL 端,我们将使用 cl_update_vk_semaphore 信号量向 Vulkan 发出工作完成的信号,以进行下一帧的操作(其中 first_submit 为 false)。这确保了在 OpenCL 队列完成工作之前,Vulkan 图形队列不会开始访问图像。